Metal Coil Problems: Top 5 Metal Substrate Defects To Look Out For
If you’re purchasing a new standing seam metal roof or have been working as a professional in the architectural metals industry for a while, it’s critical to know the most common metal substrate defects that could show up on a metal sheet or coil product.
If you’re purchasing a new standing seam metal roof or have been working as a professional in the architectural metals industry for a while, it’s critical to know the most common metal substrate defects that could show up on a metal sheet or coil product.
Not only will knowing this information stop you from installing defective materials on a home or property, but it will also save you time and money spent to fix any issues it could cause.
While defective metal has ended up in the hands of installers before, the majority of coil defects are caught by the manufacturers, suppliers, or production lines before the metal is ever sold to a customer. Quality assurance measures exist to make sure that only the best material is used to rollform and install a metal roofing system.
So, what signs should you look for to spot any substrate defects?
Sheffield Metals has been supplying coated and bare metal sheet and coil products to the architectural metals market for over 20 years. While rare, metal coil being defective in one way or another is still a possibility. This is why we believe educating the industry about the most common substrate defects is the best way to ensure any bad material is caught before an installation.
In this article, we’ll go through:
- The coating production process that a metal coil takes
- The most common substrate defects
- What to do if you notice an issue with your metal
Material Production Process: From Steel Mill to Supplier
Before we get into the defects that can show up on painted or acrylic-coated steel (Galvalume) sheets or coils, we first want to explain the journey that steel takes from the beginning stages to the final stages.
Stage 1: Steel Mill

The metal that ultimately becomes a metal roof or wall starts as a flat, cold-rolled carbon steel substrate. The raw steel that we purchase is already tension-leveled, meaning that many of the imperfections in the material have been worked out before it ever makes it to a steel mill or paint line. For reference, tension leveling is the process of pulling the metal beyond its yield point and applying immense pressure, which permanently changes the shape of the metal. In this case, the tension leveling keeps the material flat and straight as it’s rolled into coil form.
Once this material is sourced/purchased by a manufacturer, it is sent for processing to a steel mill. The mill takes the raw metal and continuously hot-dips the bare steel coil/sheet with aluminum and zinc alloys until it reaches a coating consisting of 55% aluminum, 43.4% zinc, and 1.6% silicone. This process allows for one steel-based product to have some of the best characteristics of each coating material, which is why it’s become one of the most popular materials in today’s roofing market.
For background, two different products are produced at the steel mill:
- AZ50 – Painted Galvalume sheet and coil
- AZ55 – Unpainted Galvalume sheet and coil (commonly called acrylic-coated Galvalume)
The number after the “AZ” refers to the coating weight that is applied to the raw substrate, so an AZ55’s coating weight is .55 ounces per square foot, and AZ50’s coating weight is .50 ounces per square foot. The unpainted, acrylic-coated Galvalume has a slightly thicker coating weight because it will not have the paint system to cover it, so it needs some extra exposure protection.
Once the coil is coated at the steel mill, any products intended to be painted (AZ50) are sent to the paint line, while the completed AZ55 products go to the manufacturer/distributor.
Stage 2: Paint Line
For the products that now have the AZ50 Galvalume coating on the steel substrate, the next step is going through a paint line that applies the paint system.
Coil coating paint lines have many different processes and stages, which you can watch in our video on The Metal Roofing Channel, but here is a basic explanation of what a coil goes through at the coating line:
- The entire coil enters the paint line at the entry mandible and begins unrolling.
- The material goes through a steering roller that centers the metal coil along the line.
- The coil is cleaned of all oil, debris, rust, etc., in the washing station.
- The coil goes through a leveler to fix any damaged edges, dents, or imperfections.
- A ChemTreat coating is applied and baked on, which helps the primer and paint adhere to the metal.
- A primer is applied and cured to the surface in a primer oven.
- The metal runs through a quench tank to prepare for paint application.
- The finish coating (or paint system) is rolled onto the top of the metal.
- The material enters a finishing oven and then goes into another quench tank to cure the topcoat.
- The painted coil is re-rolled and removed from the line.
After the material is off the paint line, the coil goes through rigorous quality assurance testing. For example, the paint line company will run these tests (and more in some cases) on the painted coil to verify:
- Dry film thickness, or DFT (the thickness of a coating as measured above the substrate)
- Impact resistance
- Humidity resistance
- Pencil hardness
- Film adhesion
- Salt-spray (if applicable)
- T-bends
Once the material passes all of the tests, it will be packaged and shipped to the supplier or manufacturer.
Stage #3: Supplier

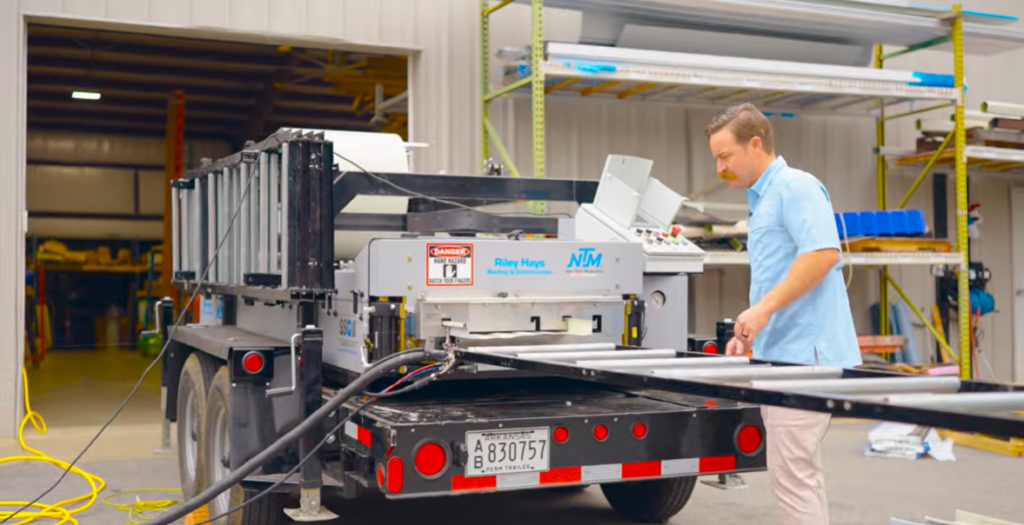
The final stage of a metal coil’s production journey ends at the supplier/manufacturer who purchased the material and sent it through the steel mill and paint line. Sheffield Metals would be considered a supplier.
While all suppliers’ capabilities vary from company to company, the material comes into Sheffield Metals specifically as 9,000 to 12,000-pound master coils. From there, we process most of the material after a customer submits an order (we do not require an order minimum). Plus, any of our customers have the option to purchase 40”, 44”, and 48” master coils to help minimize scrap and drop-cuts, and can utilize our slitting, cut-to-length, strippable PVC application, and re-rolling services.
However, before any coil is sold or shipped out of a Sheffield Metals location, the material goes through even more quality assurance measures, including:
- Checking for any damaged packaging upon delivery from a steel mill or paint line.
- Leaving the protective packaging on the metal when still in inventory.
- Performing a thorough visual inspection once the coil is removed from the packaging to check for dents, inconsistencies, and other damage.
- Positioning bright lighting above the slitter to further inspect the metal when it is going through the processor.
- The bright lights allow us to see any light bouncing off the metal as it goes through the slitter and is recoiled, which allows our operators (there are two or three on the line at any given time) to spot any shape issues easily.
- If we observe an issue, we stop the line immediately and collect samples for further investigation. From there, we can decide if a consultation with the steel mill, paint line, or other party is necessary.
- If any coil is found to be out of tolerance or has a defect, it is rejected and removed from inventory before ever making it to a customer.
If the metal looks good and doesn’t show signs of defects, the material is approved to be sent to regional manufacturers, contractors, builders, and beyond for rollforming and eventual installation.
Most Common Metal Coil Substrate Defects & Definitions
Now that you have a little bit of background on how metal sheets and coils start as a raw steel substrate and becomes a painted or acrylic-coated coil, let’s get into some of the substrate defects that could occur.
Keep in mind: The majority of metal does NOT have any defects. But it’s good to be aware of these phenomena so they can be caught before a significant amount of material is wasted and especially before any installing begins.
Defect #1: Coil Set

Coil set refers to the metal retaining its curved shape as it comes off the coil roll. Metal is processed by being subjected to very high heat, which is then cooled to the point where you can see the grain in the metal. From there, it’s either rolled out further or rolled up into coil form. However, metal has a memory, so if the metal wasn’t correctly tension-leveled or is uneven in thickness when rolled into a coil, the material may attempt to move back to its original shape, which is when you could see coil set come into play.
Defect #2: Edge Wave

Edge wave is a metal substrate defect that creates ripples on the edges of the coil. There are several causes for edge waves, but most of them are due to the edges being longer than the central portion of the coil. This extra edge material then becomes wavy while the center of the material remains flat. To fix the edge wave, the center of the coil will require stretching.
Defect #3: Center Buckle (Buckling)

A couple of different buckling types can occur on a coil, but the most common is a center buckle, which is when the coil center is longer than the edges. This defect can create ripples in the center of the material. Correcting a center buckle requires the edges to be stretched to meet the length of the center of the coil.
Defect #4: Crossbow

A crossbow is a defect where the top surface of the metal coil is longer than the bottom surface, which creates a bowing at the ends; it is especially noticeable during slitting. According to thefabricator.com, “correcting it [crossbow] requires stretching the bottom width and compressing the top width. This is difficult to accomplish because the work is being done in the longitudinal direction while the problem is in the transverse.”
Defect #5: Camber

Coil camber is when the edges of the material are stretched on one side and curve slightly to create edges that are not parallel. To see if a coil has a camber, lay a piece of the coil flat on the ground, then put a straight material (such as a piece of lumber, pipe, or another linear object) up against the edge. If two points on the edge of the coil stay up against the straight material, but the area between the points doesn’t and curves away, the coil may be cambering (see photo). Most camber issues stem from the slitters that cut the material, so ensuring that shears remain sharp is the best way to prevent this phenomenon (sharp cutting shears are less likely to pull on the coil and create unequal stresses associated with cambering).
What to Do if You Suspect a Metal Substrate Defect
As we mentioned, most defective metal coil material is caught before it ever makes it to a customer or end-user.
However, what should you do if you’re running out a coil or running it through your rollforming machine and you notice an issue?
First and foremost, stop running your rollformer. Once you stop the rollformer from running out panels, you’ll need to send a small amount of test material through the machine. Do not test the whole coil or anything more than 300 feet of metal to see if the suspected defect is only on a portion of the coil. It’s difficult for manufacturers/suppliers to investigate the issue if the coil has been fully rollformed into panels. This is why it’s critical to have a qualified rollforming machine operator who pays close attention and knows what defect indicators to look for during production.
Second, contact the manufacturer if you suspect there is something wrong with the coil.
Be prepared to describe what you’re seeing and what you’ve already tried in detail. The manufacturer will be able to provide you with a course of action that is specific to the suspected defect or situation. In the end, the manufacturer is there to work through challenges that might come up so you can get back to rollforming and installing standing seam metal roofing systems.
Keep in mind: Many issues that show up during rollforming are due to one or more adjustments that need to be made on the rollformer, which is not related to coil defects. If you suspect your rollformer is causing the issue, such as panels running out uphill/downhill or the panels are coming out of the machine crooked, please contact the machine manufacturer or the supplier where you purchased the rollformer.
Final Thoughts on Metal Substrate Defects
Metal coil goes on a long production journey before it ever makes it into the hands of fabricators and contractors, and then ultimately on a home or property owner’s structure.
Luckily, this puts many different eyes on the metal so that any imperfections or defects can be caught and remedied immediately.
However, if you notice a problem or are questioning if a defect might be present, the best thing you can do is STOP rollforming or installing panels and call the supplier/manufacturer to discuss your concerns. The last thing you want is for the problem to be ignored or brushed aside, which could lead to even bigger problems (roof failure, replacement, etc.) down the line.
After over two decades of supplying metal coils and sheets, the Sheffield Metals team knows what to look for when determining if a metal product is defective or not. While rare, it can happen, which is why we’re always available to discuss your coil questions, concerns, and challenges.
Contact us today to talk to one of our knowledgeable and helpful metal roofing specialists!