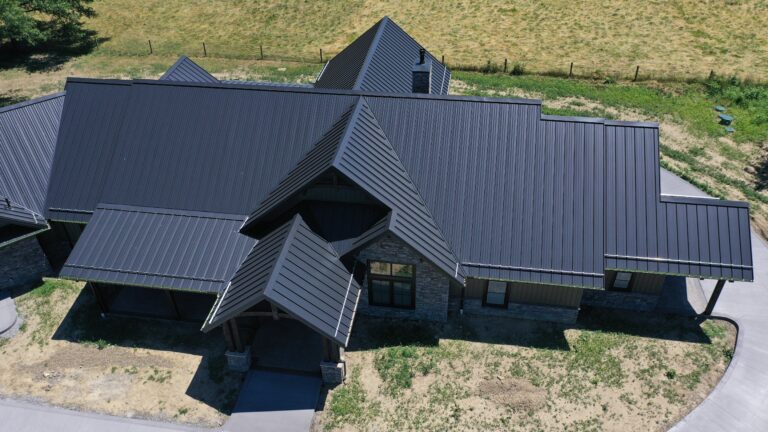
What Are Metal Roof Installation Details & How to Avoid Detail Problems
Manufacturer installation details for how to properly install a standing seam metal roof are critical to the success of a metal roof system. Learn about some bad installation examples and...
Have you ever purchased a new desk or bookshelf from one of those big-box stores where you had to take it home and assemble it? The recommended instructions and step-by-step details for items like this make it far easier to put together, right?
Now, let’s think of it on a larger scale. Would you want something as important as their roof put on your property without the installers following any set guidelines or tested methods of installation?
The answer is probably no. Whether you’re a property owner, roofing contractor, or installer: The metal roof should be installed according to the manufacturer’s recommended installation details.
At Sheffield Metals, we put a significant amount of time and testing into our installation details for all of our engineered standing seam metal roofing profiles. These guidelines for how to properly install the flashing materials are critical to the success of the roof system, and that’s why we want to share:
- What installation details are and why they’re important
- Inadequate/inferior installation detail scenarios
- How to avoid problems from bad installation details
What Are Metal Roof Installation Details?
Metal roof installation details provide an in-depth product guide detailing the location of components and accessories, and then explains basic practical installation methods for these products at various points on the roof.

What to Look for on Installation Details
Installation details will vary depending on the manufacturer, but most details are broken down according to (or a combination of these attributes):
- Panel profile type
- Metal material used
- Roof deck substrate and assembly (i.e., included insulation)
From there, details are typically long documents that outline the information of the panel profile, applicable industry standards or testing, maintenance, warranties, hemming, and then the installation details shown as drawings.
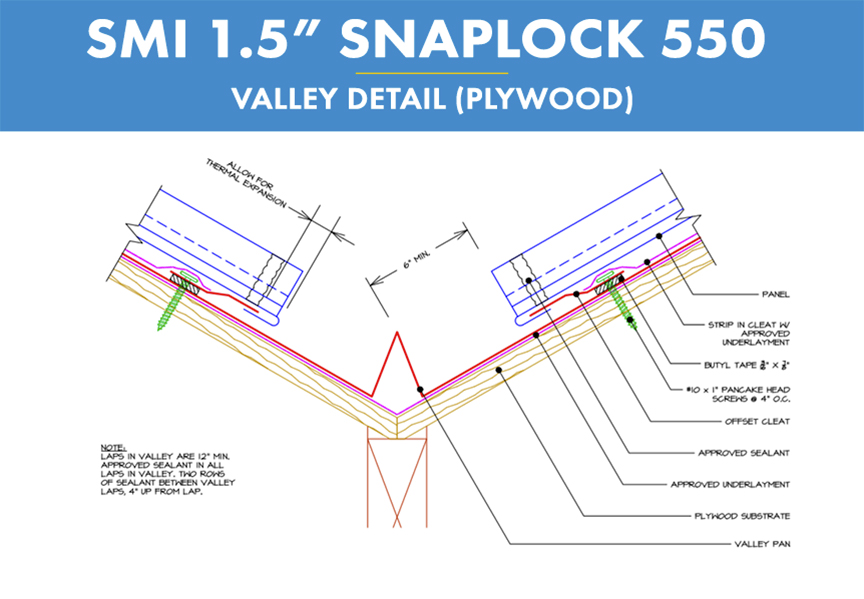
For example, let’s look at the details provided on the SMI 1.5” SnapLock 550 Plywood Installation Details. On this set of installation details, you can find details of how to install at the:
- Eaves
- Eaves with a gutter
- Rakes/gables
- Valleys
- Penetration points
- Headwalls
- Sidewalls
- Hips and ridges
- Vented ridges
- High side eaves
- Roof transitions
- Curbs
- Lightning protections
- Roof/fascia transitions
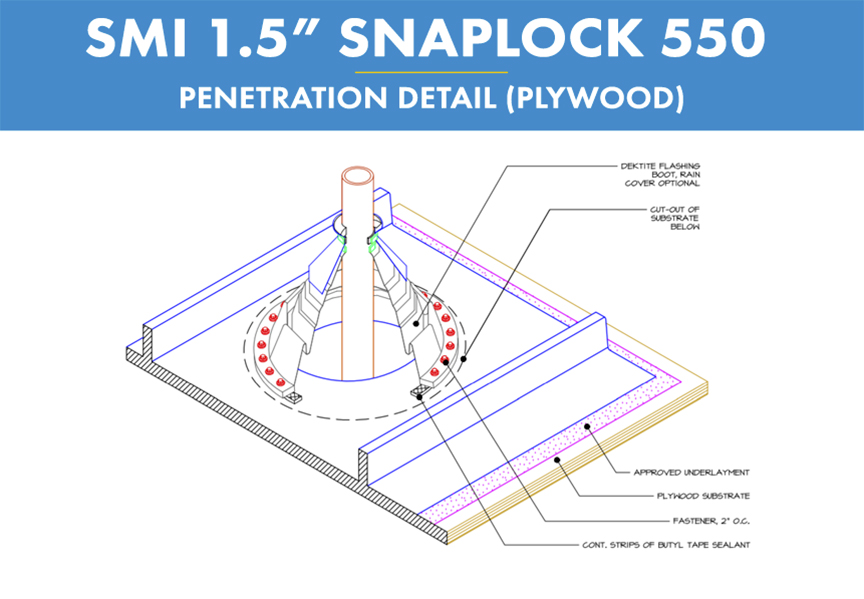
All of these roof points have a detailed, layered drawing of how the components come together and are to be installed, including the order, types, measurements, exact locations/spacings, and special installation instructions. Commonly, details should include the installation of:
- Flashings
- Fasteners
- Sealant
- Butyl tape
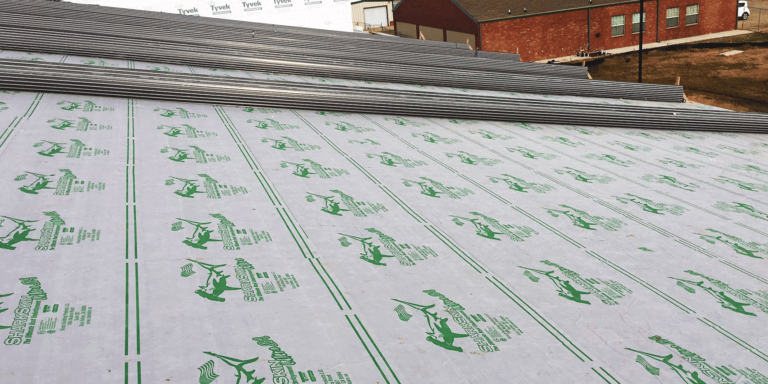
- Substrate/deck
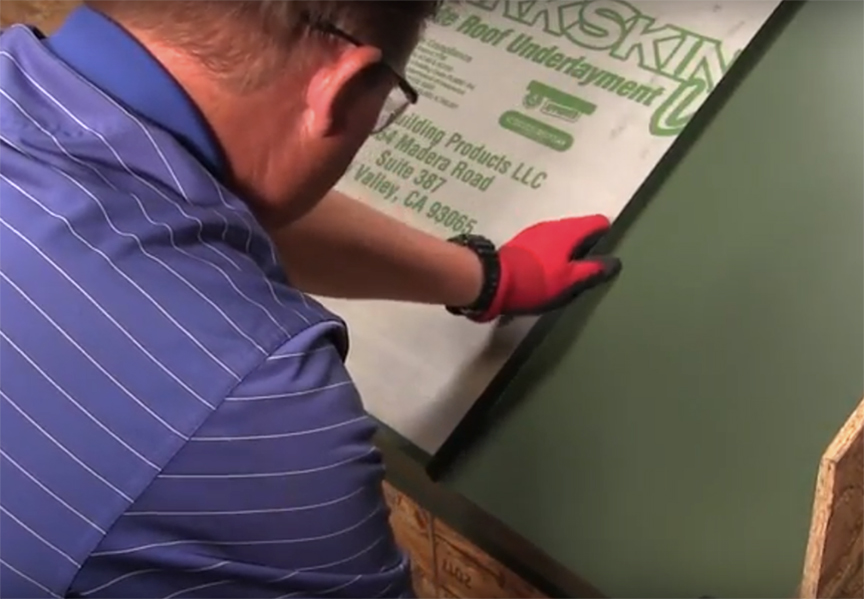
- Underlayment
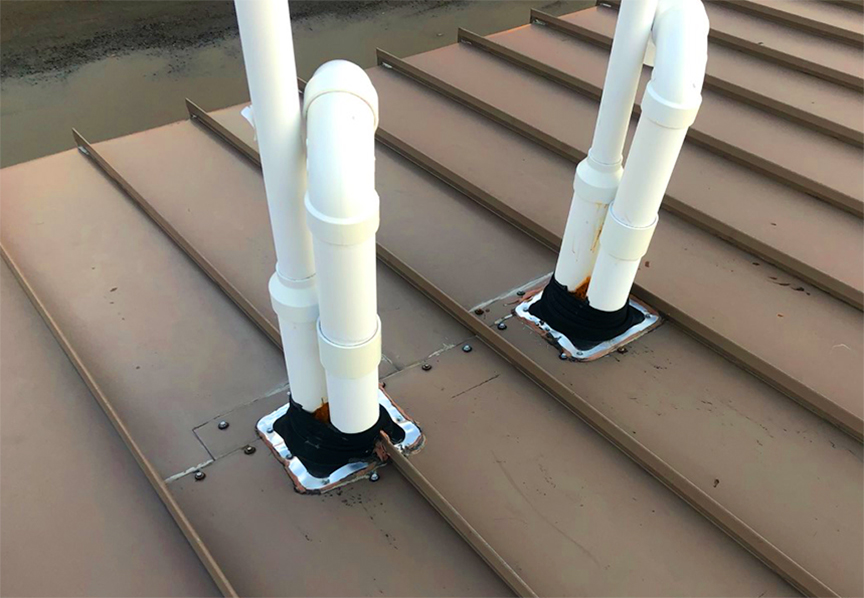
- Pipe boots
- Miscellaneous accessories
Your installation details will coordinate to the layout of your roof plan, which will show:
- Where the panels are at in that region of the roof
- How the building looks at that region of the roof
- Any other roof structures or penetrations that might affect that region of the roof (i.e., vent pipes, etc.)
Why Should You Use Metal Roofing Installation Details?
Not having or not using any installation details for a metal roof system provides no frame of reference for installers to follow. While some contractors or installers might be able to get by with little guidance, failing to use details often results in a guessing game of how the manufacturer wants their products installed. This simply doesn’t benefit the property owner, contractors, or anyone else involved.
Keep in mind that manufacturers of the metal/profile system put a lot of time and money into their installation details to ensure their details are weathertight and structurally sound.
Considerations About Installation Details to Remember
#1: A bad installation doesn’t mean the roof looks bad.
Installation details exist solely to protect the roof from leaking and failing, which then prevents damage to other parts of the structure. Just remember that because the roof looks good on the outside doesn’t mean that it was installed to the manufacturer’s recommended details. That’s why it’s critical to verify this fact with the contractors.
#2: Just because the installation details don’t match the manufacturer’s details doesn’t mean they’re invalid.
While it’s typically recommended that you follow the details provided by the manufacturer of the metal, this doesn’t mean that other details won’t work as well. Just be aware of this fact and discuss any concerns with the manufacturer before the installation.
#3: Do not use details that are illegible, unorganized, or difficult to understand.
If you run into a situation as a property owner or installer where you don’t understand the details, the measurements are off, or the document is unorganized, it’s best to question if you should use them. Again, the best course of action is to talk to the manufacturer to see if you can get clarity on their details, or find other, more concise details to follow before the installation takes place.
#4: As a property owner, it’s recommended that you go over the installation details with your contractor.
Not only does going over the details give you some insight into how the roof will be installed on your property, but it also helps verify the installation details are appropriately utilized.
10 Bad Metal Roof Installation Details That You Should Avoid on Your Project
Bad detail #1: Putting rivets in valleys.
If installed correctly, there should be no need for rivets in the valley. When you drill a hole for a rivet, you are pretty much ensured to poke a hole in the underlayment, which can create a spot for potential leaks. On top of that, the center of the rivet has a hole in it. So, now not only do you have a hole in the underlayment, but now there’s a hole in the center of the rivet to allow water in.
Bad detail #2: Exposed fasteners that go through the flat portions of the panels.
Luckily, exposed fastener metal roofing is a category of its own and is different from the standing seam metal roof systems that we’re referring to here. If there are any panels on your roof that have an exposed fastener (this does NOT include flashing points), the potential of springing a leak increases significantly. It also can pin the panel if fastened through to the decking, which will stop the thermal movement of the panel and create stress points.
Bad detail #3: Double pinning the panels at the eave and ridge.
In standing seam roofing systems, the panels generally aren’t double pinned (if installed to our recommended details). Not double pinning the roof means that the panels can expand and contract better, which reduces the likelihood of oil canning, fasteners backing out, etc. For reference, SMI’s details pins all panels at the top to allow the expansion to take place at the eave.
Bad detail #4: Putting pipe boots over the seam.
Pipe boots are not designed to make sharp right angles to properly fit over a standing seam on a metal roof, which means it won’t make the penetration completely water-tight and you are counting on caulking for water-tightness.
Bad detail #5: Using sealant as a primary defense against water.
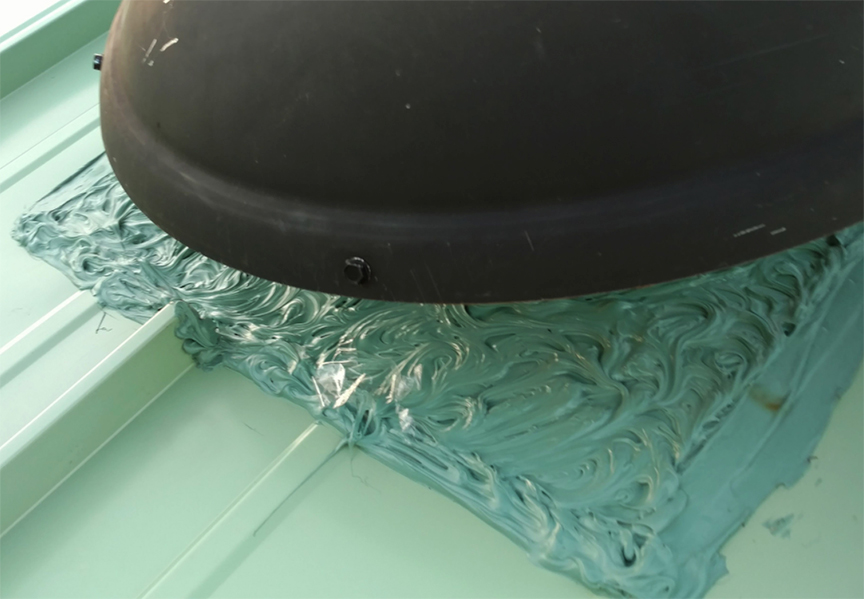
Sealant is added to a roof system as a secondary defense against water intrusion at flashing laps or penetration locations. In other words, you shouldn’t see sealant if you’re looking at the roof, especially big globs of it being used as a primary water defense.
Bad detail #6: Modified J (or J-channel).
A J-channel is a type of flashing material that is used in metal roofing. However, we’ve seen these materials trap water and dirt, which can accelerate corrosion of the metal in some instances. On top of that, J-channels can restrict the expansion and contraction of the roof system as well.
Bad detail #7: Using a C/Z-closure (especially in snow environments).
In this detail, the top of the panel is slid into a receiver at the ridge cap. Most of the time, the top of the panel is not fastened off, which could allow the panel to slide down the roof. Also, you are counting on sealant as the primary defense against water intrusion, which is never recommended.
Bad detail #8: Any roof penetration that isn’t correctly flashed.
Details exist to tell you or the installer exactly how to install the flashing materials around penetration points correctly. However, there are some flashings, such as those for skylights, that come with kits or other “recommended” installation directions. These are often NOT recommended by the manufacturer for use on a metal roof system.
Bad detail #9: Large, visible gaps of any kind.
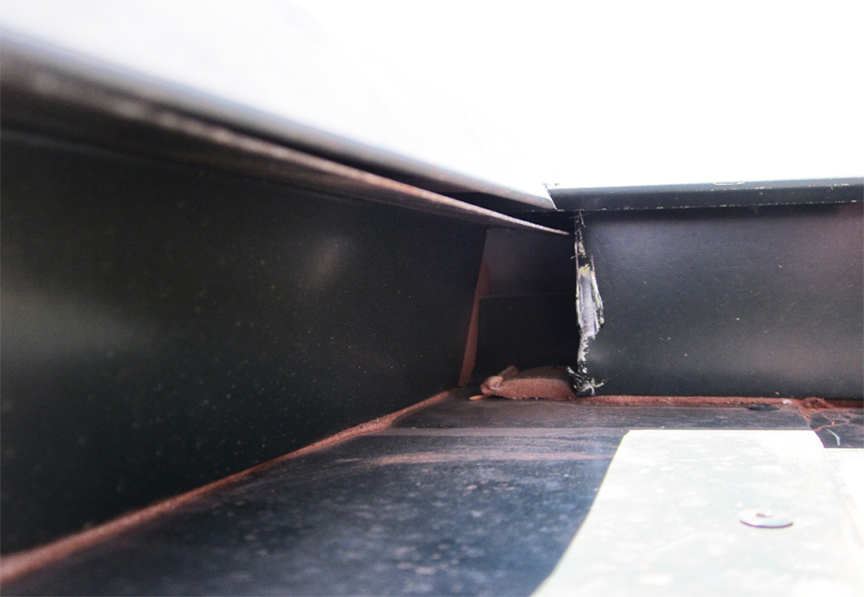
Gaps are the recipe for leaking – it’s as simple as that. There shouldn’t be gaps at any point in your roof system, so if there are, it’s critical to correct it immediately. Gaps can also invite unwanted “guests,” such as insects, rodents, and other destructive critters.
Bad detail #10: Leaving exposed edges where there isn’t a hem on the metal.
Painted metal sheet and coil are rollformed to make the panels, trim, and flashing materials, which means it needs to be slit to the correct size for the project. When there’s an exposed edge from a cut to the metal, it needs to be hemmed to avoid edge creep and excessive rusting that can be detrimental to a metal roof. Plus, a hemmed edge generally is more tidy and aesthetically pleasing.
Additional Detail Concerns to Look for
Beyond the ten we’ve listed above, there are other inadequate metal roof installation details and practices that you should look out for and avoid, including:
- Lapping sheet metal to look compressed. You should have a minimum 4-inch lap on your flashings (except valleys [12-inch lap]), and these laps must go in the same direction as the water flows and have sealant installed at the laps.
- Using drywall or other generic fasteners instead of metal roofing specific fasteners.
- Seams on a mechanically seamed system that look mangled, unengaged, or improperly seamed.
- Cutting panels with saw blades not designed to cut metal.
- Drilling pop rivets into the roof without a barrier on top of the panel, which can lead to swarf particles creating rust.
- Leaving dead valleys, narrow valleys, and other improper water drainage spots.
- Installing the wrong panel profile for your low-slope or steep-slope roof application.
- Using too much touch up paint or the wrong color (touch up paint will fade differently than the rest of your roof).
- Running metallics or other lot-specific finishes in differing directions instead of the same direction.
How to Protect Your Installation from Bad Details
When trying to avoid bad installation details, the best course of action involves being proactive instead of reactive, so it’s easier to fix an aspect of the installation before it’s complete. That’s is why it’s critical to educate yourself and, if you’re a property owner, go through the installation details with the installer before the project begins.

Here are some steps you can take to avoid any metal roofing issues related to details before it even begins:
- Talk to a specific manufacturer and ask for referrals to contractors who they know will follow their verified installation details. Doing this will help take some of the guesswork out of finding a contractor on your own.
- During the consultations with the contractors, you can stipulate that you want to install a specific set of details on your project. If the contractor is unable or unwilling to use the details you want, it’s best to find a more qualified contractor.
- Ask questions. You’re encouraged to ask questions during the consultation process. Whether it’s a question about the right profile for your roof, how much sealant you should use, or what the details are for the installation — the contractor should be able to confidently and clearly answer your questions.
- When in doubt, check the contractor’s reviews and ask for referrals. You can learn a lot about a business by its ratings and reviews on Google, social media channels, and other ratings-based websites. And don’t just stop there either. If you have a friend, family member, or neighbor who recently had a metal roof installed on their home or business building, they are one of the best places to look. Ask them who they hired as their contractor and if their contractor followed the manufacturer’s details.
- When going through the installation details with a contractor, look for secondary protections used on the roof, such as laps or sealant. For example, all of our details at SMI have a secondary defense component if something drastic were to happen to the original flashing.
- If you’re still questioning the installation details, you can always hire a third-party consultant who can come in and be there during the installation. They’re more likely to be objective and ensure installation details are followed accordingly. However, keep in mind that this is an expensive course of action to take.
Final Thoughts on Metal Roofing Installation Details

Your roof is the first and last defense from the elements that have taken their toll on everything around us. Why not protect the inside of your property and the roofing project in the best way possible by ensuring it’s done right the first time?
One thing to keep in mind is that nothing will ever be “perfect.” And just become something doesn’t look perfect on your roof, doesn’t mean that it’s wrong — it might be exactly what the manufacturer recommends.
Remember this fact when considering installation details: It’s much easier to make sure the right manufacturer’s installation details are used from the start than it is to go back, tear up various parts of the roof, and then redo it.
For nearly 25 years, Sheffield Metals has been continuously perfecting our installation details to make sure that if followed, a roof using our metal sheet/coil is installed to last decades. We have an entire Technical department that works with contractors and installers to assist with any installation-related questions.
To discuss installation details or if you have any other technical questions, contact the Sheffield Metals Technical department today!